BLISTER PROCESS & FINAL

28/3/18 TUTORIAL
REQUIREMENTS:
Aluminium Sheets
CNC Cutter
Drills
Screws
Plywood template
Mallets
Dolly
Clamps
Wooden cork (self made)
Partner: Jeremy Hizkia (Industrial Design)
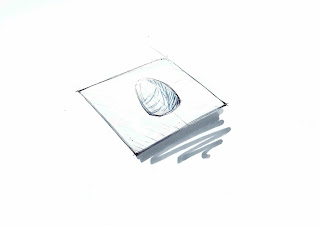
The purpose of this exercise is to form a blister at the center of the aluminium plate while keeping all the untouched areas as clean and smooth as possible throughout the process.
PROCESS
Preparation (with a partner)
 |
| Illustrator file |
We had Ed teaching us the basics of using the CNC machines worked in the FabLab.
While doing so, he prepared us 32 unique teardrop shapes cut (not fully but '95%') onto MDF boards (250x250mm each), which will be used as templates to sandwich our aluminium plate.
 |
| Removing the three intact supporters (located on white circles) to prepare MDF templates. |
Two MDF templates contain an identical teardrop shape (labelled in numbers). My partner Jeremy and I chose template no. 10 for this exercise. We used a trim router to sand off the remaining supporters on both boards. We also received a scrap wood as a corking tool.

After making our corking tool with a disc sander, we proceeded to preparing our aluminium plates. Russell and Dan advised us to cut our plates smaller than the MDF templates to make the sandwiching process more efficient.
 |
| They also assisted us in bolting all three pieces together using screws to ensure the aluminium plate is strongly intact in between (thanks guys). |

Finally, we tightly clamped the sandwiched piece onto an edge of a working table. All of this preparation was done to ensure that the aluminium plate would remain stationary and retain its form for as long as possible while the center is being stretched into a blister.
Using both sides of a nylon mallet, I began by stretching the flat metal surface at the lower end of the blister template, and continued my way around the edges until I created a rough depth of the blister.
I then firmly placed our corking tool to reach out the edges of the blister template in order to further stretch out our metal work as much as possible.
One challenge I faced was reaching the smallest end of the teardrop shape.
To solve this, I switched to using a dolly as a hammer to further stretch out the smallest end.
It was important to note that metal contact may leave out marks and dents, which would be difficult to fix, and so I did this process as lightly as possible in order to avoid any obvious distortion and marks.
With visible bumps, marks, and slight dents left behind from the previous steps, my final steps involved me having to smooth the stretched surface of the blister for as much as possible.
I first carefully removed the top MDF template, using the bottom template as my bed, and switched back to using the pointed end of the nylon mallet to gently hit all areas of the newly formed blister.
My last step involved me switching to a sandbag as a bed, followed by the same stretching process with the rounded end of the mallet, which helped further increase the depth of the blister as well as alleviate any annoying dents and marks made before.
 |
| END RESULT: Front and Back. |
Reflection: Overall, I was really glad to have learned Dan's metal bowl and tray method beforehand because the techniques and skills were applied in this exercise, as well making the blister. The MDF board were provided as templates (much like the sandwich plywood templates for the trays) as well as using the nylon mallet to stretch the center of the aluminium plate in order to create depth (much like stretching the center of the bowl to achieve the exact same thing). I feel as though that I'm confident in creating depth from here on out as I understand the nature of how metal reacts when worked upon...something I think would be a useful skill in the fuel tank group assignment.
FINAL SHOTS


Comments
Post a Comment