Computer Aided Design (CAD)
CAD has the ability of producing very accurate (and emaculate) designs. It enables designers to create 2D and 3D illustrations and renders effectively and efficiently for any given project, increasing productivity and improving design communicaition methods.
With manual drafting, you must determine the scale of a view before you start drafting (including units). This scale compares the size of the actual object to the size of the model drawn on paper.
Communication is key in today's design industry. CAD allows designers, educators, clients and workers, to view designs at every angle, zooming in and out, inside and out. It is a powerful tool that engineers, designers, architects and everyone in the built environment industry use today.

Software used: Keyshot

Software used: Fusion 360
Fusion 360: Sunnies Case Tutorial


In this lesson, you're going to create your first 3D printed model, you're very own sunnies case! It is a simple, yet elegant design that will teach you the basics of some of the main features, tools and techniques of the Autodesk Fusion 360 Software that hopefully you can use later in your life as designers.
Let's begin..

1. Fire up a new file, select 'sketch', which opens up different plans for you to choose from. I personally go with the 'Y' (green) and 'X' (red) plane, so do that and you will end up in a position like the image above. Ask teacher for clarification if confused.

2. Select 'sketch' and rectangle tool to construct a simple rectangular shape from the origin point.

3. The two things we should always be mindful of are the dimensions and position. To finalise dimensions, type 'd' on your keyboard, which opens up the dimension tool.
Select each side and type the following dimensions:
Length: 42mm
Width: 32mm
Significance: This finalises the dimensions of your shape. The black lines (formally blue) indicates this. Refer to the image above.

4. Select the fillet tool to create curves on each edge of your rectangular box. The fillet tool will ask you to select 'two legs' to generate the curve. Select each sides to create the fillet like the image above.

5. Offset
An offset is a seperate, independent part created from the original shape. You will create two offset shapes from the original shape.
Using the offset tool, select the original shape and type '-1mm', which will generate a new offset within your shape.
Afterwards, using the offset tool, select your original shape again, by this time type '-2mm'. This will generate another offset within both your shapes, like the highlighted red shape above.
Significance: You will end up with three shapes, which will be used as references for extrusion later on.

6. To create the second component of your sunnies care, highlight your entire shape and select 'rectangular pattern', like the image above.

7. Opening the rectangular pattern tool opens up a dialogue box, asking for a horizontal and verticle quantity and distance.
In the vertical column, type "1" for quantity, and leave distance as "0".
In the horizontal column, type "2" for quantity for the replica and "52mm" in the distance, and you will see your shape being replicated further along the right from the origin.

8. Now you should end up on your screen with two perfectly parralleled. You will notice how all the dimensions are tied to your original shape.
Significance: This means both shapes are in 'sync', meaning that you can now adjust your dimensions on one shape, which will also change the rest that has been replicated.

9. Exit sketch, and jump onto the 'Extrude' tool. To get a better angle, select the 'rotate' tool to orbit around your sketch for a better angle to select what you want to extrude.

10. Reminder: You created three 'faces' to select for extruding.
Extrude Face 1 to 2mm
Extrude Face 2 to 120mm
Extrude Face 3 to 100mm
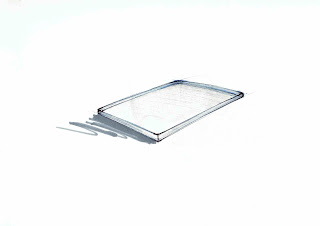
You have created your first component of the case, it should look like the image below...

11. Jump onto your 'replica' sketch (the lid), and extrude the following faces:
Extrude Face 1 to 2 mm
Extrude Face 2 to 20 mm
Extrude Face 3 to 40 mm

12. To adjust dimensions, simply jump back to 'edit sketch', and the extrusion will also follow through.

And there you have it, you have now created your sunnies case! You can use the same software to create your furniture pieces.
Save this file onto an 'STL (Standard Triangular Language)' file and to 3D print.
Move on creating your small space furniture piece...
 Next time, I will introduce you to the 'assembly' feature, as your furniture piece may require multiple components to 'assemble'.
Save this file onto an 'STL (Standard Triangular Language)' file and to 3D print.
Move on creating your small space furniture piece...


Nice...
ReplyDelete