BOWL PROCESS & FINAL


3/7/18 TUTORIAL
REQUIREMENTS
Circle template (laser cut)
Radius Gauge
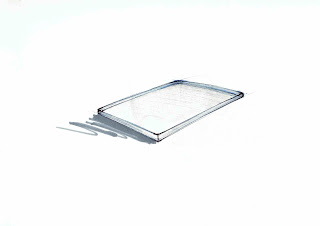
Aluminium Plate
Tin Snip
Nylon Mallet
Planish Hammer
Wooden Stump
Round Dolly
Sandbag
English Wheel
Filer
The goal for this exercise is to create a bowl using a flat aluminium sheet based on a chosen measurement of the radius gauge.
PROCESS
PREPARATION STAGE: Laser Cut

Martin briefly taught us some basic skills (RBG coding) in laser cutting. Using the machines, he provided us wooden circle templates, ranging from 230mm in diameter, descending down to 180mm, 130mm and finally to 80mm. He also provided us a radius gauge as well, in which I could use to keep track of the bowl accuracy.
Making the Aluminium Plate

We were provided with annealed aluminium. I traced all the circle templates onto an annealed aluminium plate with a non-permanent marker, which provided me reference lines to help me keep track on where I'm hitting.
Cut


I used a tin snip to cut out the outer circle which got me my aluminium plate.
The photo on the right shows the reference lines I used to know which parts of the plate has to be hit harder (the closer the reference line is to the center, the greater the depth).
Referencing Hit Points


The photo on the right shows the reference lines I used to know which parts of the plate has to be hit harder (the closer the reference line is to the center, the greater the depth).
Referencing Hit Points
 |
| I didn't have a photo for it, but I also had dot points around the reference lines (red dots) which helped me determine where to hit with the nylon mallet through the process. |
STRETCHING & SHRINKING: Hammer Forming
 |
| So Dan's method usually starts off with shrinking your bowl on a wooden stump, but I began using a sandbag instead because I wanted to be cautious with what I was doing throughout the process and the sandbag provided a soft bed, meaning that the 'hitting' impact on the inside of the bowl wasn't as impactful as the outside surface. |
That being said, I started by using the rounded side of the nylon mallet to stretch the centre of the flat aluminium plate and once I got confident with my rhythm, I then progressed my aluminium plate onto the hollow space of the wooden stump.

Now applying Dan's method, I placed my progress workpiece onto one side of the hollow space of the wooden stump and started hitting the outer hit points of the reference lines with the 'pointy end' of the nylon mallet, which created sharp ripples.

Switching back to the rounded nylon mallet, I flattened the sharp ripples back to the point of where I can resume shrinking the bowl, and I continue this cycle starting from the outer reference circle towards the center, creating a nice shape of the bowl.
Once this is done, I repeated the cycle with the remaining marked inner lines towards the center.
I learned that using a sandbag will soften the hits, allowing me to have more control of my work, but also costs time to achieve a consistent and round finish.
NOTE: Depending on what radius measurement you've chosen on the radius gauge, make sure you hit each points at similar pressure levels for a consistent finish at the end.
 |
| The sort of result expected afterwards. |
Planishing

Dan's also taught us that we can achieve a nice texture when flattening our bowls using a Round Dolly and a Planishing Hammer. Another benefit from planishing (flattening) is that it can smooth any bumps and dents that occurred in previous steps.
NOTE: Ideal finish would be the result of consistent pressured hitting ALL around your bowl.
 |
| The result left a lot of noticeable 'dot marks' all around the bowl, which was something I didn't expect. The planishing process also didn't completely get rid of all bumps. |
English Wheel

Chosen lower wheel (125R) for the English Wheel set.
NOTE: Be sure to choose the right radius of the wheel (use your chosen radius gauge as guide).


Gabe showed us a good way to smooth the skin of the bowls as a finishing touch using the English Wheel. There were two different sizes, one outside the Workshop and one inside.
To use this, I pushed and slide my work piece back and forth in between the wheels by applying small amounts of pressure.
One thing I learned was knowing when my bowl was completely smooth, as the first few rounds are usually more difficult and 'bumpy', which highlights the result of all the hammering and stretching in the previous steps.
It wasn't necessary important, but I much preferred using the Wheel that was inside the Workshop due to its larger size, which covered more area.
NOTE: Avoid applying too much pressure or else you will end up with an inconsistent finish, and in worse cases, permanent marks.
 |
| Result after English Wheel |
Reflection: The overall exercise has helped me appreciate the craftsmanship behind hammer forming metal. We were taught a certain method, but trying out different ways myself has certainly got me more interested in learning more about how metal shaping techniques.
POLISH
So previously I mentioned how the planishing process didn't come as I expected. So I decided to sand the outside surface of the bowl using a 320 grit sandpaper, which gave it a nice matte look. I then finished off the bowl using a Brasso Metal Polish.
Extra: Process Video
FINAL SHOTS


 |
| Photos taken by Arif Sudarsono (friend). |

Comments
Post a Comment