TORUS / REVERSE CURVE PROCESS & FINAL
14/03/2018 TUTORIAL
REQUIREMENTS:
Aluminium plate (annealed)
Metal Mallet
Nylon Mallet
Planish Hammer
Metal Curving Rolls
Wooden Stump
Shrinking Dolly
English Wheel
Filer
In Civil Engineering, a Torus, also known as the Reverse Curve, is defined when a curve to the left or right is followed immediately by a curve in the opposite direction. The goal of this exercise is to achieve the same definition using an annealed aluminium strip.
PROCESS
Both Dan and Gabe gave lessons on different ways of creating a reverse curve out of an aluminium piece. I decided to follow Dan's method for this exercise, shrinking the center my aluminium piece against a concave curve radius of a stump with a hammer and curving the outside edges with a dolly, because I felt as though this method would be a good practice on hammer forming techniques and I particularly enjoyed the bowl making process, which was also done by a combination of mallets (nylon, wood and iron), dollies and other accessible tools.
Scoring
Grab a piece of annealed aluminium piece (240x115mm) and use a small ruler and pen to score reference lines.
Curving and Shrinking
 |
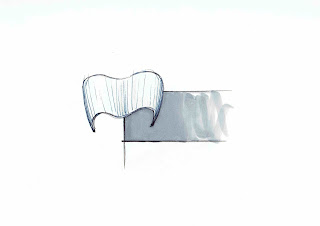
| Here's a basic illustration of my plan on where I wanted to hit (red dots) as well as understanding how the shrinking process works (I noticed the right diagram should say 'stretch' instead. |
Curving the strip:
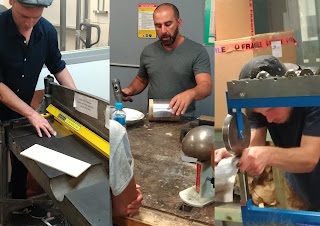
After scoring, usually I should be placing the strip onto the stump straight away, but I used the bead roller to curve my straight metal piece first so that it can naturally rests on top of the wooden stump for as long as possible while I shrink the center with a mallet.
Shrinking the center: Using my marked hit points, I began hitting points using an iron mallet with appropriate force to shrink down the center of the work piece. The images above show that I used the concave curve radius of a wooden stump as my guide to determine the depth of my work piece's center curve.
NOTE: I started hitting the widest points first and work my way towards the center for a more consistent and curvaceous finish. Another thing to point out was that the radius of the stump didn't cover the entire strip, thus I began working on the middle section of strip, and then moved onto the top and bottom sections later.
Next, I switched to using the rounded nylon mallet for the same process, which in contrast would smooth the large bumps and dents left behind from using the iron mallet, with similar force.
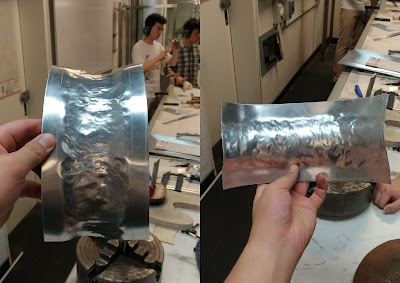

Then afterwards, I used a filer to file down the edges in order to achieve an even length on both sides before moving on to stretching the outside edges.
Planishing (Stretching the outside edges)
To curve the edges, I placed the edge of the torus onto a shrinking dolly curved finish using a planishing hammer.
NOTE: I applied minimal pressure in every hit in order to achieve a consistent curved appearance on both sides.
English Wheel
I then used minimal pressure again when pushing my curve onto the wheel (located the metal room). This was done to even out the bumps and dents left behind after the previous steps.
NOTE: I avoided 'pushing and pulling' my work piece back and forth since I wanted to ensure consistency and balance throughout.
Polishing
Using an 80 grit, I sanded my work piece onto one direction, clearing out any visible marks of bumps. Then, apply metal polish onto work and wipe thoroughly using a clothe for a fine and quality finish.
Extra: Process Video
Reflection: Applying Dan's technique in the previous exercise (metal bowl process), which was starting on the outer areas and working my way towards the center of a work piece, proved to be an excellent way of achieving a good finish overall for any work. It was a bit of a challenge to keep the curve going on both sides of the torus, and I could have approached it better by being more light in my hammer forming process, as the visible dents and marks were clearly evident to how hard I was hitting the metal.
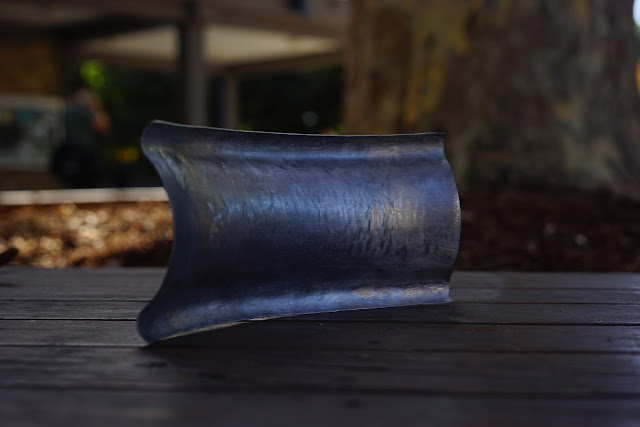
FINAL SHOTS
 |
| Photos taken by Arif Sudarsono |




Comments
Post a Comment