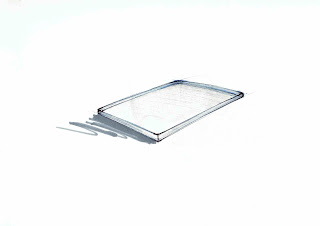
TRAY PROCESS & FINAL
20/3/18 TUTORIAL
REQUIREMENTS:
Aluminium Sheet
Metal Rod
Circle Templates
Tin Snip
Nylon Mallet
Planish Hammer
Wooden Stump
Clamps
Sand Block
Partner: Natalie 'Nat' Dou (Interior Architecture)
Metal Rod
Circle Templates
Tin Snip
Nylon Mallet
Planish Hammer
Wooden Stump
Clamps
Sand Block
Partner: Natalie 'Nat' Dou (Interior Architecture)
The goal for this exercise is to make two identical box shaped trays out of annealed aluminium plate that will fit perfectly with on top of one another.
PROCESS
Templates
My partner Nat and I decided that we should use two identical (30mm radius cornered) plywood templates (60 x 180mm) as our guide throughout this exercise; this would help us ensure that we are shaping our aluminium trays to an identical finish so that it may both fit at the end.
 |
| Using a disc sander to create and equal 30mm radius curved corners of both plywood templates |
We had to take into account that a tray contains folded sides.
In account to this, Nat and I measured and cut our aluminium sheets by 200 x 80mm using the guillotine; this would leave an equal excess amount on all sides by 10mm in relation to the plywood templates, by which will be used as the folded sides.
We also used a fountain pen to mark the dimensions of the plywood templates onto the aluminium sheets, alongside a center line on all components to ensure we can shape our works efficiently through the identical contours.
 |
| Set up |
Forming
Following Daniel's method, we clamped our piece together and used the pointy side of the nylon mallet to fold the aluminium plate onto one side.
 |
| Stretching out the tucks produced around the corners. |
To avoid any occurrence of sharper tucks, we used the flatter side of the mallet to as well as a planishing hammer to stretch out them out as much as we could, and proceeded to folding again with lesser pressure.
 |
| We used a plier to take out the folded tray out of the plywood template. |
 |
| Using a round dolly helped flatten the folds, creating a smooth surface around the corners |
Comparing
After hammer forming both trays, using the same plywood templates, we noticed that both trays had uneven depths on the sides after shrinking the aluminium.

We measured the smallest side to be 12mm, and so to match this with all the other sides, we used the giant tin snip to cut off the any excess depths on both trays and made sure all depths were even and consistent in both trays.
We then moved on to using a sand board to smooth the skin of our trays, especially the sides, so that both of them can fit on top of one another perfectly.
Fitting
 |
| 60mm diameter trays fit reasonably well at the end. |
The 60mm diameter exercise went well and we wanted to push ourselves further by making two identical trays out of a 30mm diameter (smallest diameter on the circle templates). The process was the same but took a bit longer as the radius on the corners were a bit of a challenge.
 |
| 30mm diameter. Both trays (thankfully) were able to fit together decently at the end. |
Reflection: I could argue that this was possibly the most challenging exercise I faced in all metalwork exercises. It made me learn the consequences of contacting metal against metal, as well as the difficulties of shrink corners at smaller radius'. It was all thanks to Nat and I choosing to do the 30mm diameter after the 60mm because even though we made mistakes on our first trays, we also made a couple of mistakes on the second try since the corners were smaller and harder to shrink.
I felt that the fitting process was another great challenge. We've learned was that the plywood templates become more brittle as you continually form metal around it, meaning that the next metal work would be slightly different when trying to make an identical to the previous work. This made us realize how much we needed to prepare beforehand, as well as be more delicate and precise when our approach to making things.
FINAL SHOT
 |
| Photos taken by Arif Sudarsono |


Comments
Post a Comment