4. LASER CUTTING (PT. 2)
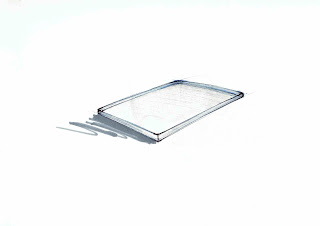
Fuel Tank SLICER views

Knowing how a skeleton model generally works, we wanted to build a strong structural foundation of our model, and we strongly thought a model with a large number of slices would be the way to do so.
Using the Slicer for Fusion 360 program enabled us to adjust the size of our Fuel Tank, alongside the joint thickness of the slices. In terms of rigidity, the program also had an option to determine the number of slices.
Cool close up shot of laser
 |
| Illustrator and Trotec file |
The slicer program did automatically made template boards for us to cut off of with the laser cutters, however, there were a lot of unnecessary spaces being left off on some boards, which the staff at the FabLAB weren't very fond of.
Using Adobe Illustrator, we manually relocated each and every sliced part onto the template boards, making sure that no extra space was revealed, and then afterwards, proceeded with laser cutting.
 |
| Laser cutting the waffle template at 2.6mm joint thickness |
FIRST attempt at assembling
With T and Nat's previous experience in assembling with waffle templates, we tried building our fuel tank model but soon learned that the joints were extremely tight, and the bigger the pieces were, the harder it was to fit in.
 |
| Failed attempt :( |
We learned that the bigger the piece, the lower the tolerance, which explained why the bigger slices began to split and break as we tried to force it in with other slices.
This means that, according to Dan, the joint thickness would better off be either at the same material thickness (3mm) or a bit higher (3.5mm).
So what did we learn here?
Our Experimentation process before led to a conclusion that was both RIGHT and WRONG.
- Yes, the 3.0 (or higher joint thickness) would lead to a wriggly structure, depending on the thickness of the material.
- No, because we only tested it on 80x70mm waffle cuts, which should technically have a lot of tolerance than a 290x150 waffle cut (fuel tank size).
 |
| Redoing the cuts at 3.5mm joint thickness |
Therefore, to make our lives easier, we decided to make another model, but this time, cutting the joints at 3.5mm joint thicknesses.
 |
| Assembling was a lot easier than before |
Process Video
Reflection:
About SLICER: Personally, I found this program extremely useful in regards to my own disciplinary as an Industrial Designer. Despite being a first time user, this program was an easy learning curve, and the potential of making a skeleton model of any conceptual design is something I would consider doing in the future. I also found that building a skeleton model was a lot of fun, so would definitely pursue doing it again.
CONTINUE ON TO PART 5 (FINAL PART)...

Comments
Post a Comment